


ASUS
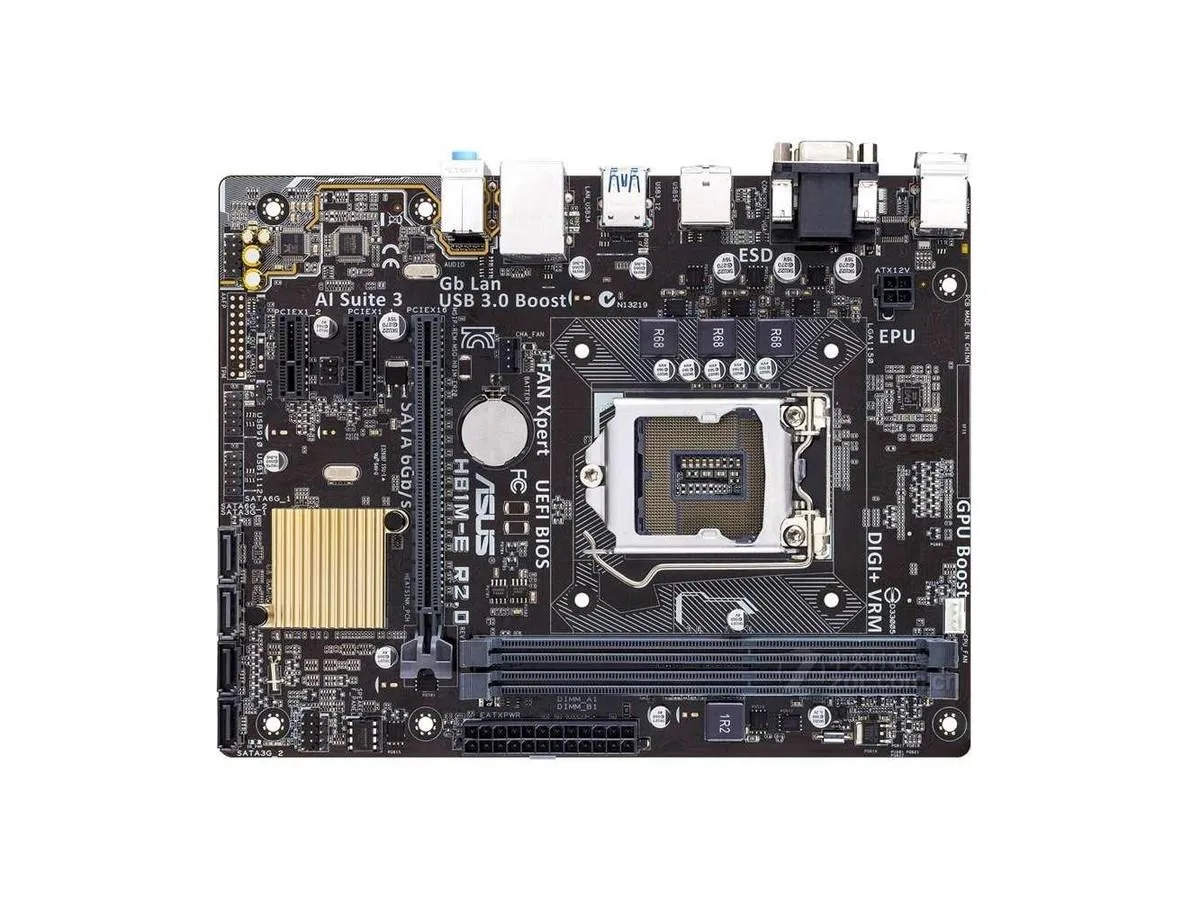
ASUS H81M-E R2.0 Intel H81 LGA 1150 DDR3 16GB Micro ATX motherboard
Micro ATX board with LGA 1150 socket, Intel H81 chipset and DDR3 memory up to 16 GB
- CPU Socket TypeLGA 1150
- ChipsetIntel H81
- Maximum Memory Supported16GB
- Supports up to 16 GB DDR3 memory for responsive multitasking
- LGA 1150 socket fits compatible Intel processors
- Intel H81 chipset provides essential platform features
- Micro ATX form factor suits compact chassis builds
- Includes SATA cable and I/O shield for quick installation
ASUS H81M-E R2.0 LGA 1150 Micro ATX
This ASUS motherboard uses the Intel H81 chipset and fits the LGA 1150 socket in a Micro ATX form factor. It supports DDR3 memory up to 16GB maximum capacity. The board suits builders assembling a basic desktop or replacing a failed unit in an existing system.
Entry builds and direct replacements only
This board suits users who need a straightforward LGA 1150 platform with DDR3 support and a single SATA cable included. Buyers who want more storage connectors, additional expansion slots, or newer memory technology should look at other options.
16GB DDR3 maximum memory limit
The specification that decides compatibility is the 16GB DDR3 memory ceiling. Verify your processor matches the LGA 1150 socket and that your memory modules are DDR3 before purchasing this motherboard.
Ciri-ciri utama
- Supports up to 16 GB DDR3 memory for responsive multitasking
- LGA 1150 socket fits compatible Intel processors
- Intel H81 chipset provides essential platform features
- Micro ATX form factor suits compact chassis builds
- Includes SATA cable and I/O shield for quick installation
Spesifikasi
| Brand | ASUS |
|---|---|
| Model | ASUS H81M-E R2.0 |
| CPU Socket Type | LGA 1150 |
| Chipset | Intel H81 |
| Maximum Memory Supported | 16GB |
Soalan tentang produk ini
What Intel H81 chipset interface caps the maximum memory on this board?
The Intel H81 chipset limits system memory to 16 GB of DDR3 across the two DIMM slots.
What physical space and mounting pattern does this Micro ATX board require?
It fits a standard Micro ATX chassis with the matching I/O shield and four mounting holes aligned to the Micro ATX screw pattern.
How is the board installed and which step is often missed?
Mount the board using all four screws, connect the 24-pin and 4-pin power cables, attach the supplied SATA cable, then insert the included metal battery before first boot.
Juga di rak ini
Pelanggan turut membandingkan
Rak yang sama, checkout yang sama — lapan koin kripto dan kunci kadar 30 minit.


Mushkin Enhanced
Mushkin Enhanced 4GB DDR2-800 CL6 SoDIMM Apple 971741A memory upgrade
USD 104.99
0.00134539BTC
Ada stok

SK hynix
SK hynix HYMD232M646C6-J 256MB DDR 333MHz PC2700 CL2.5 SODIMM laptop RAM
- 4GB (2 x 2GB)
USD 7.99
0.00010239BTC
Ada stok